Introduction
If like me, you have always wondered what is the difference between viewportWidth and width (or viewportHeight and height) in vector drawables and you tend to randomly tweak these attributes until your image looks right, this post is for you.
I will show you how these attributes differ using a simple example and some visualizations.
Example
To illustrate the difference, I created a simple app with one screen that contains a centered image filling as much content as it needs. Here is the code (in Jetpack Compose):
class MainActivity : ComponentActivity() {
    override fun onCreate(savedInstanceState: Bundle?) {
        super.onCreate(savedInstanceState)
        setContent {
            AppTheme {
                Box(
                    modifier = Modifier.fillMaxSize(),
                    contentAlignment = Alignment.Center
                ) {
                    Image(
                        painter = painterResource(id = R.drawable.rectangle),
                        contentDescription = null
                    )
                }
            }
        }
    }
}
And this is the code for the R.drawable.rectangle drawable:
<?xml version="1.0" encoding="utf-8"?>
<vector xmlns:android="http://schemas.android.com/apk/res/android"
    android:width="256dp"
    android:height="256dp"
    android:viewportWidth="36"
    android:viewportHeight="36">

    <path
        android:fillColor="#FFEB3B"
        android:pathData="M0,0 L36,0 L36,36 L0,36 z" />

    <path
        android:fillColor="#3F51B5"
        android:pathData="M2,2 L34,2 L34,34 L2,34 z" />

</vector>
If you need a refresher on how to interpret commands like M2,2 in pathData, here is a great post on Ray Wenderlich’s blog: link. But to give you a quick overview:
M2,0means Move to the point at position 2,0 (x,y).L36,0means draw a Line from the current point to the point at 36,0 (x,y).zcloses the path by drawing a straight line from the current position to the starting point.
Remember that 0,0 position is in the upper left corner. Moving to the right increases the X position and moving down increases the Y position (contrary to what you might be used to).
Both paths in the drawable above define a rectangle. The first path draws a yellow rectangle that covers the entire available space, while the second path draws a slightly smaller blue rectangle on top of the first one.
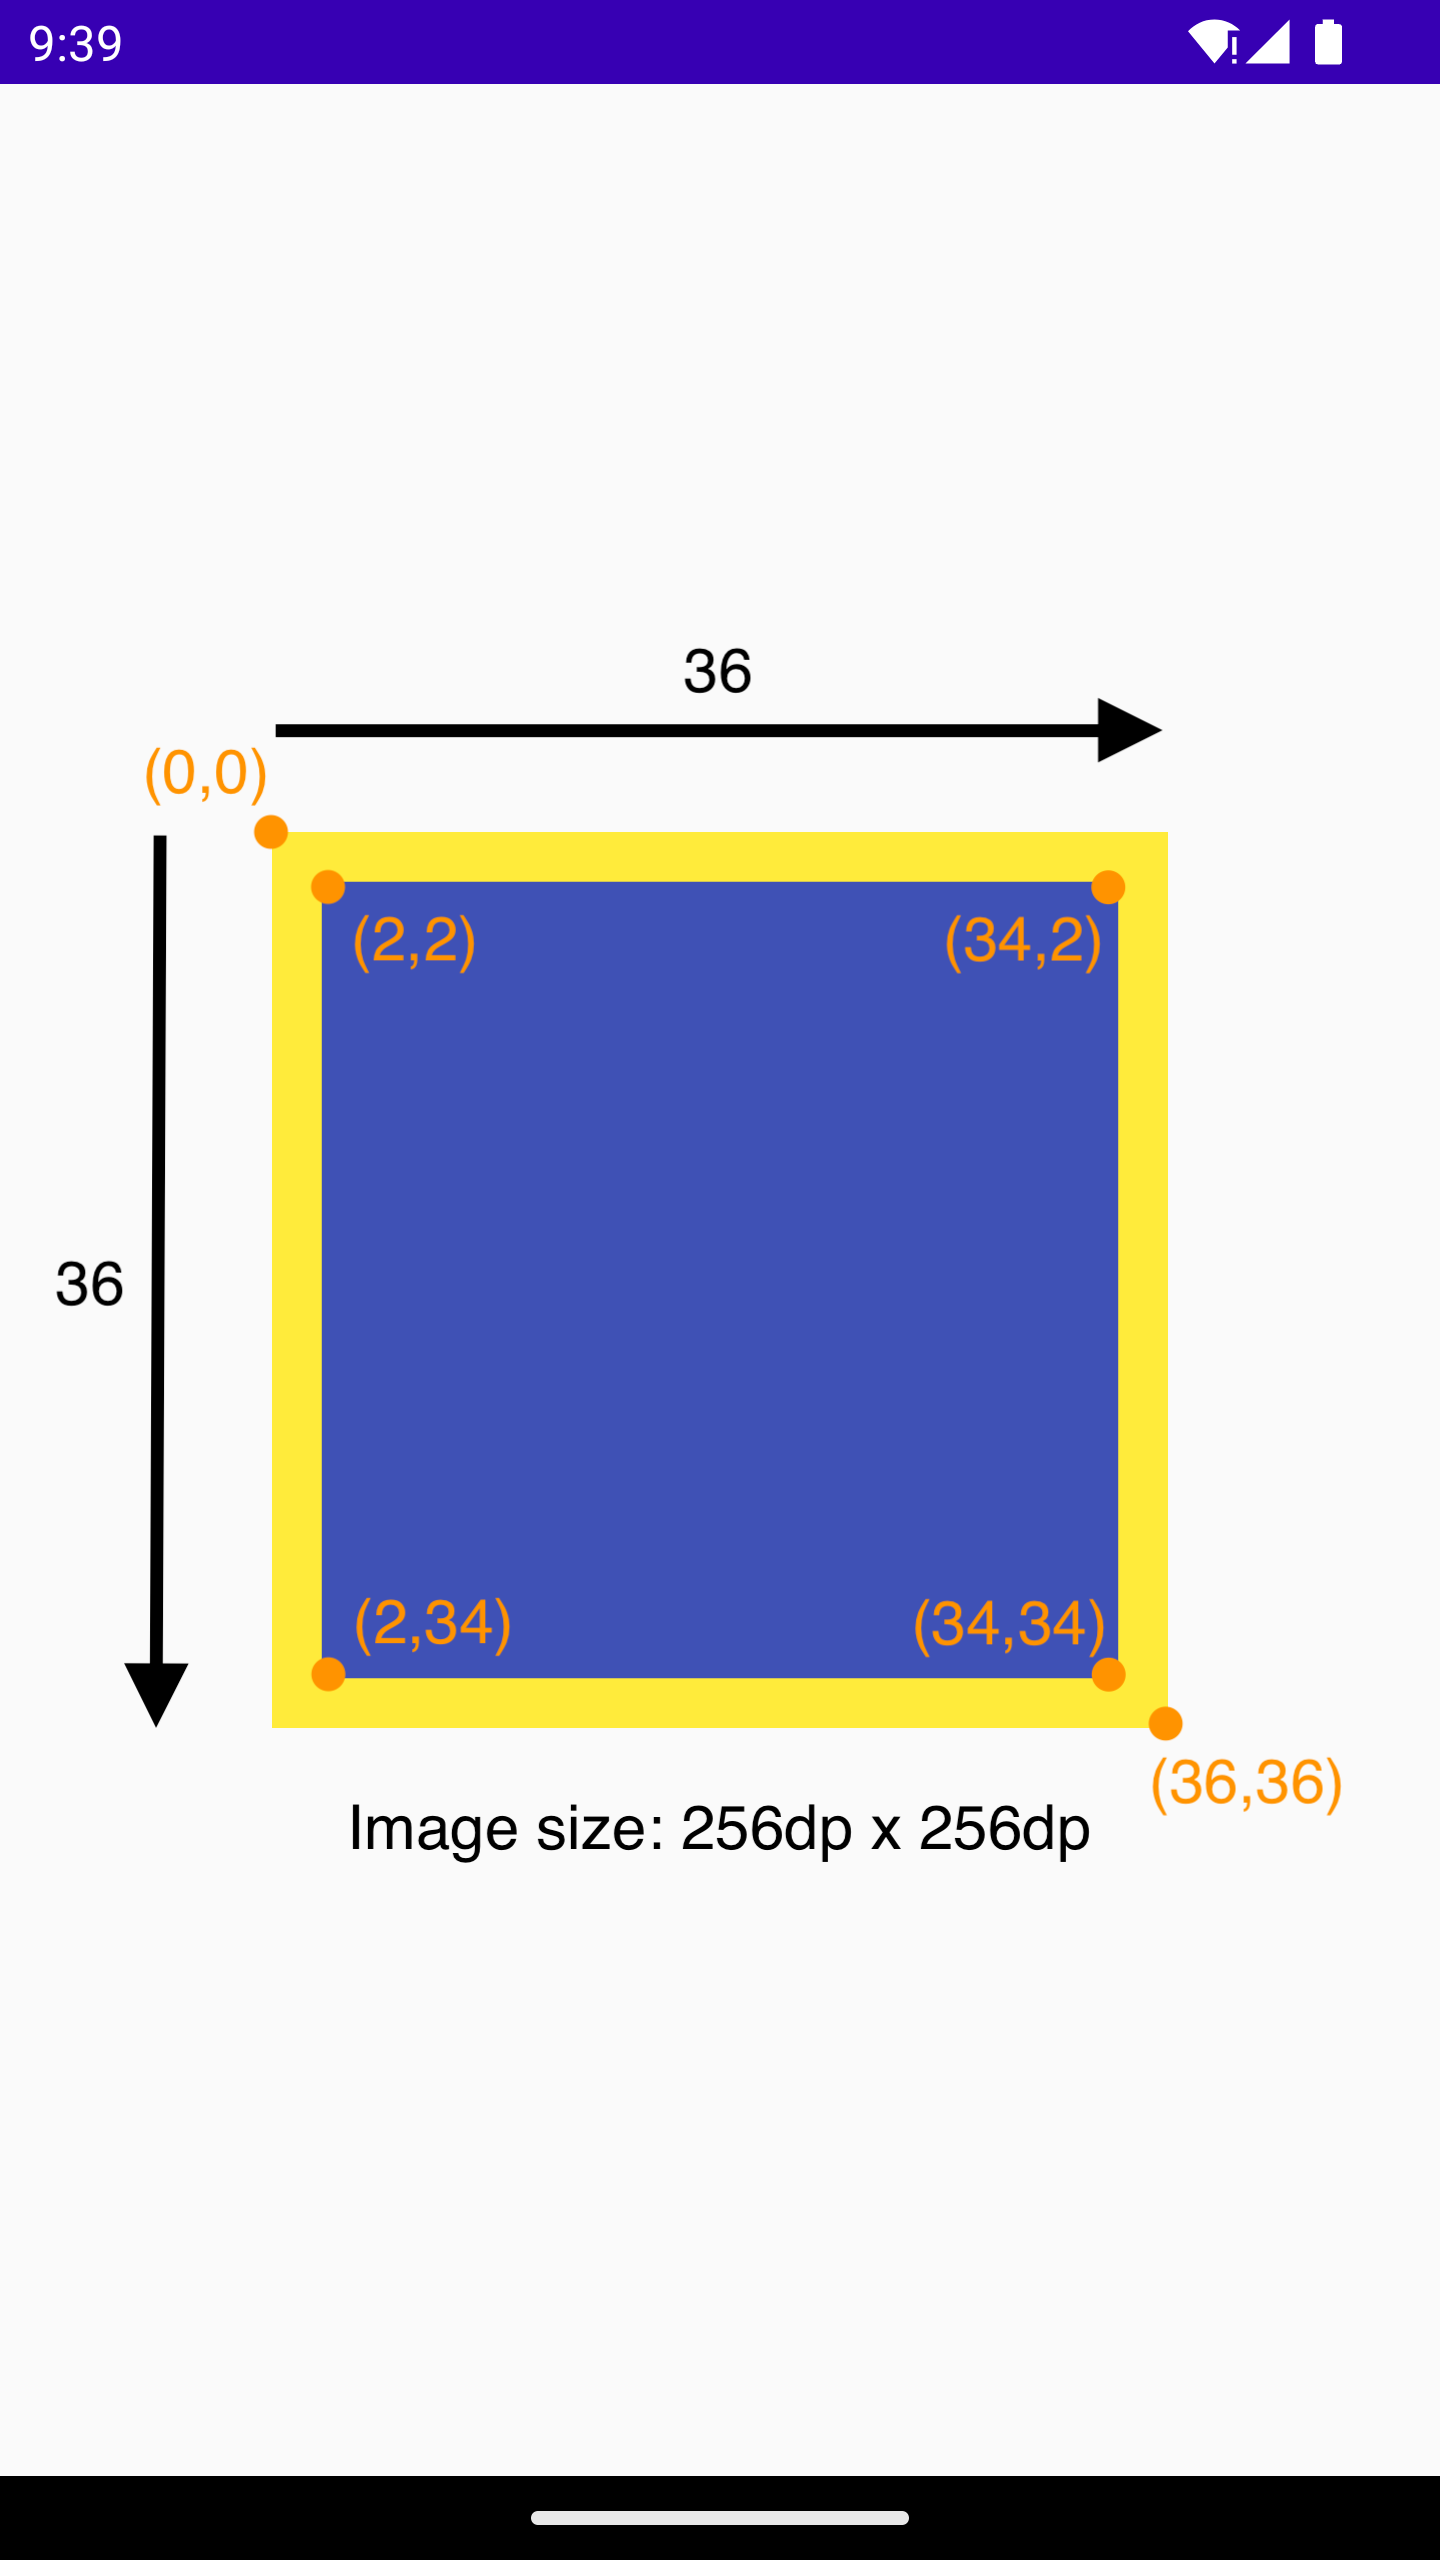
This is what the rendered image looks like:

As you can see, height and width attributes were both set to “256dp” and viewportWidth, as well as viewportHeight, to “36”.
Notice that height and width values end with “dp”. It’s because they define the intrinsic size of the drawable. In simpler words, if you give this drawable to an ImageView that covers as much space as it needs, that ImageView will have the exact same size as the drawable. That’s why in the screenshot above, the rendered image has a size of 256dp x 256dp (just like height and width values).
Conversely, viewportWidth and viewportHeight define the canvas size upon which we draw our pixels. All of our commands in pathData use coordinates from this space.
Let’s take a look at the pathData for our blue rectangle:
android:pathData="M2,2 L34,2 L34,34 L2,34 z"
As you can see, all commands here use points that are contained in a space defined by viewportWidth and viewportHeight (which is 36 x 36).
Below I marked some of the relevant coordinates:
Now let’s see what happens when I change viewportWidth and viewportHeight to “48” (and modify the yellow rectangle’s pathData to still cover the entire space as in the previous example).
<?xml version="1.0" encoding="utf-8"?>
<vector xmlns:android="http://schemas.android.com/apk/res/android"
    android:width="256dp"
    android:height="256dp"
    android:viewportWidth="48"
    android:viewportHeight="48">

    <path
        android:fillColor="#FFEB3B"
        android:pathData="M0,0 L48,0 L48,48 L0,48 z" />

    <path
        android:fillColor="#3F51B5"
        android:pathData="M2,2 L34,2 L34,34 L2,34 z" />

</vector>
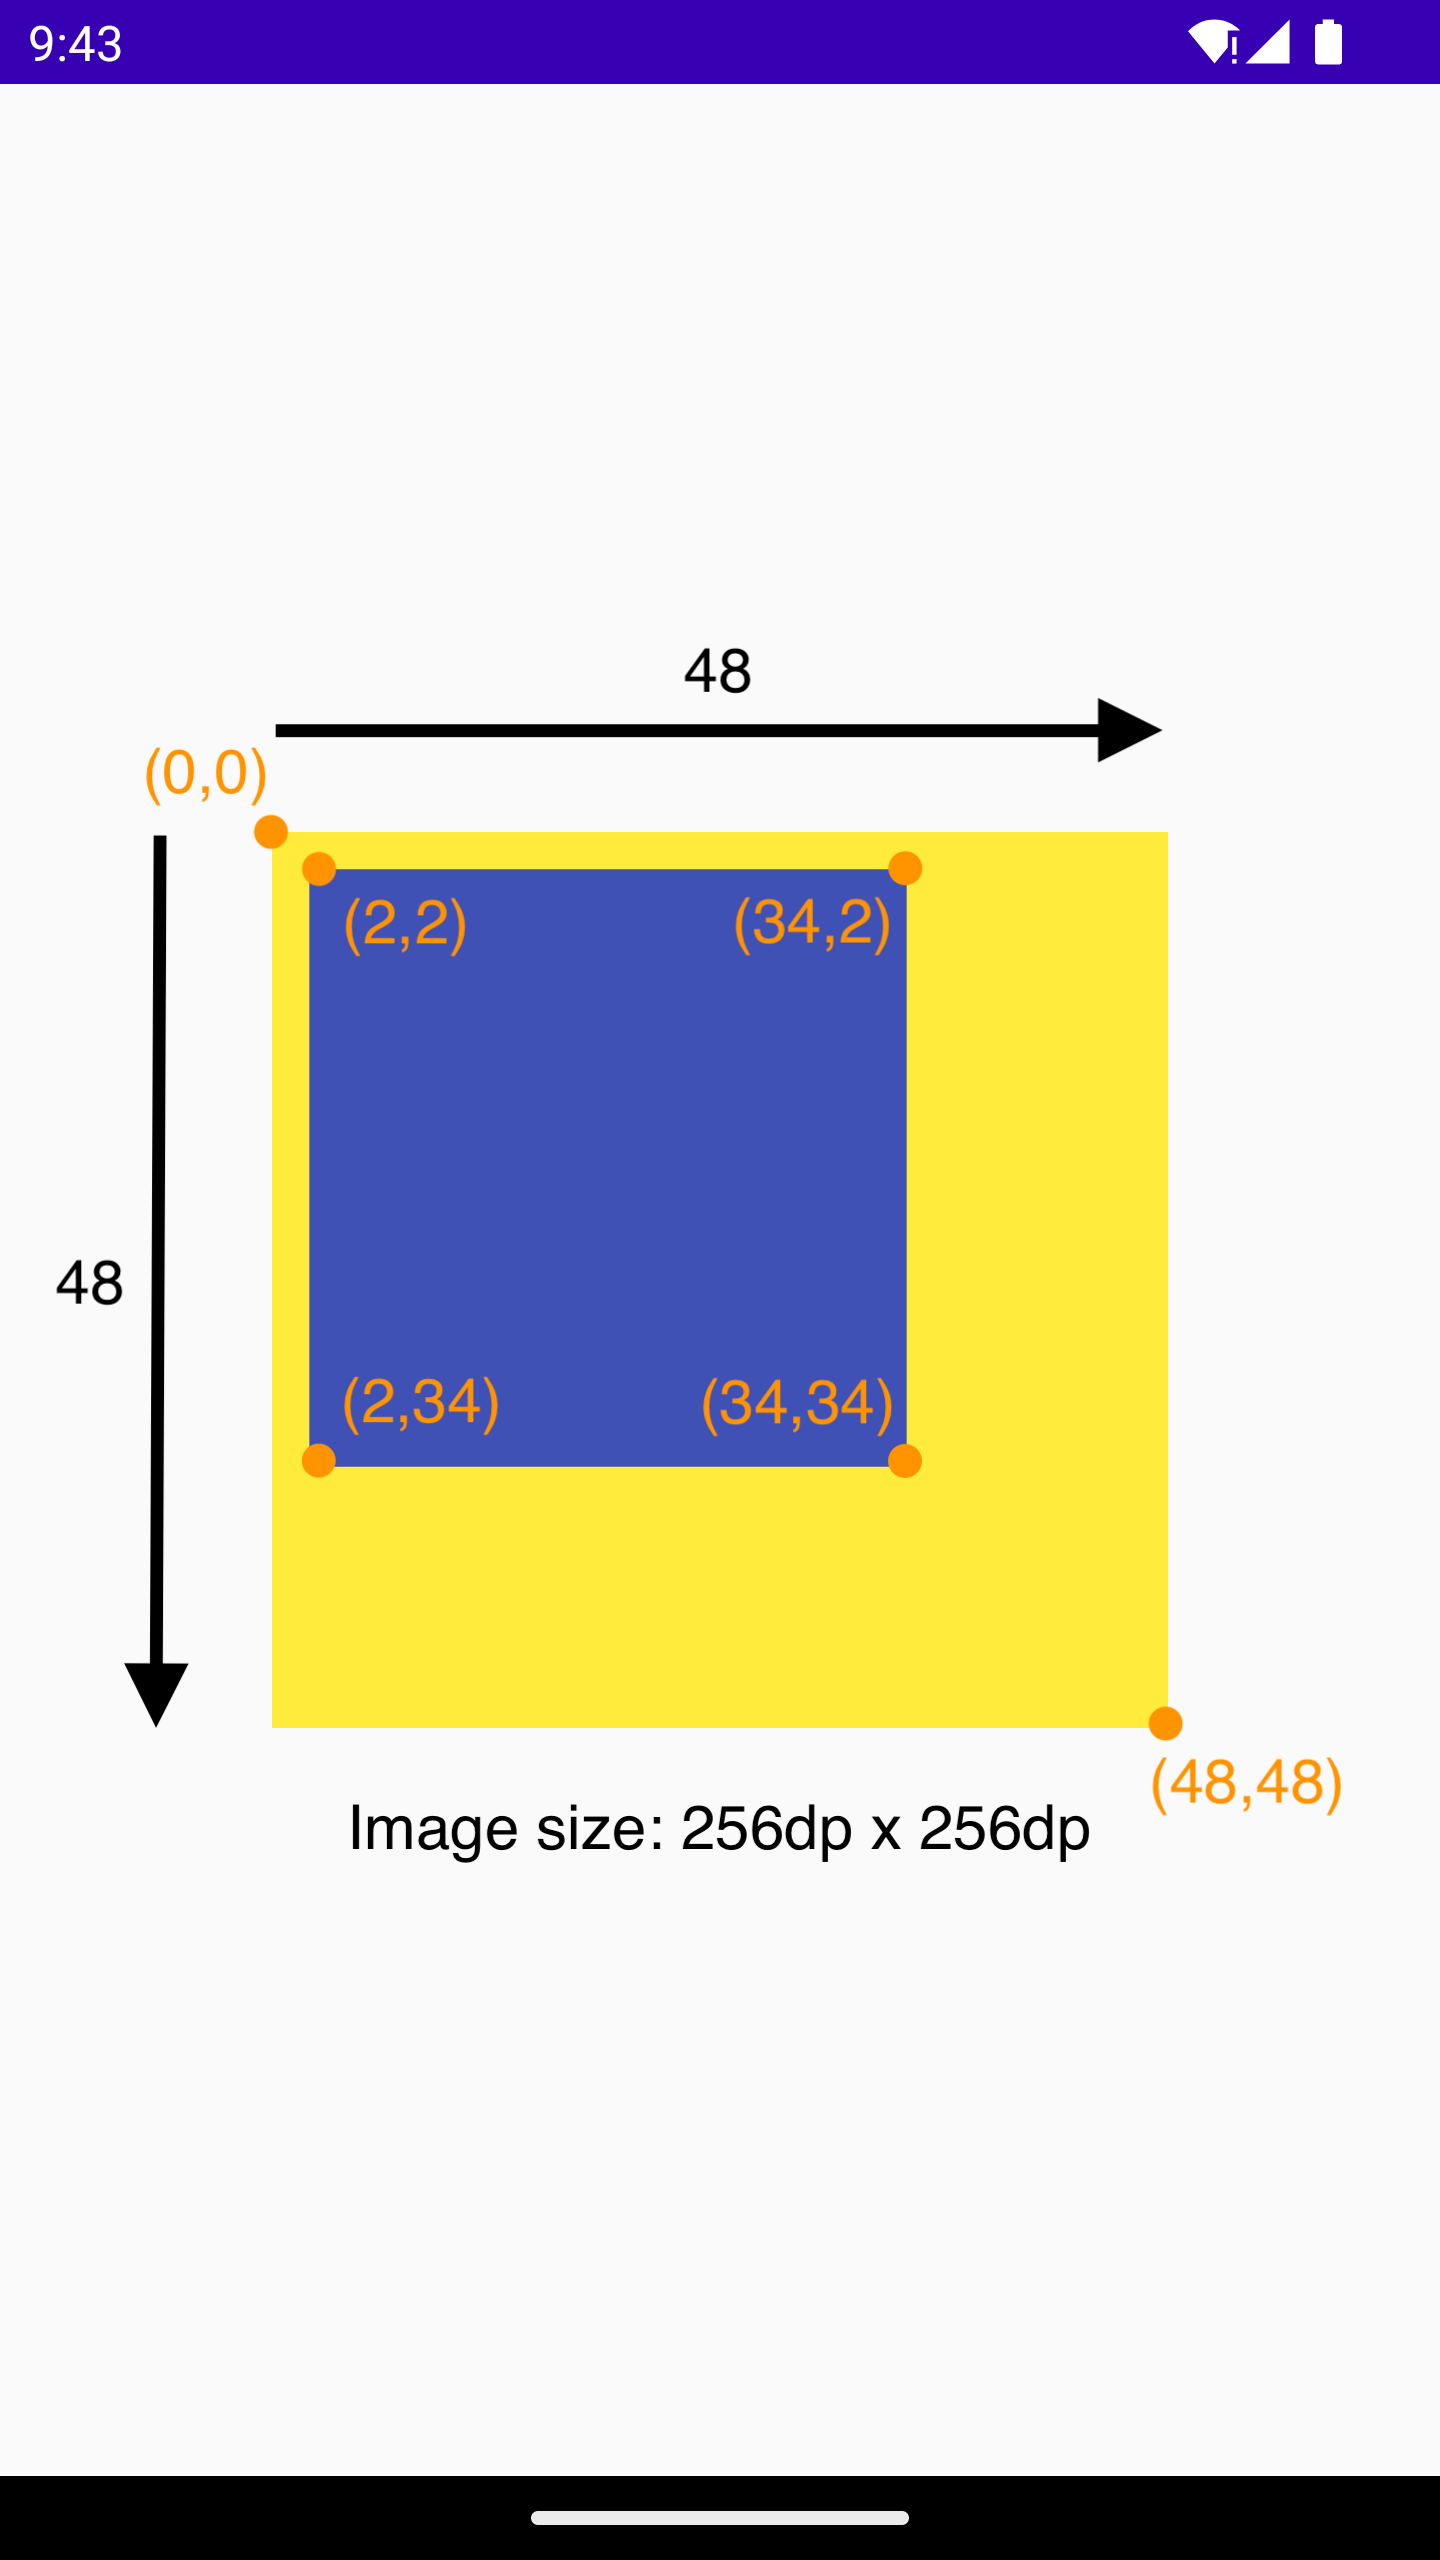
Here is the rendered result:
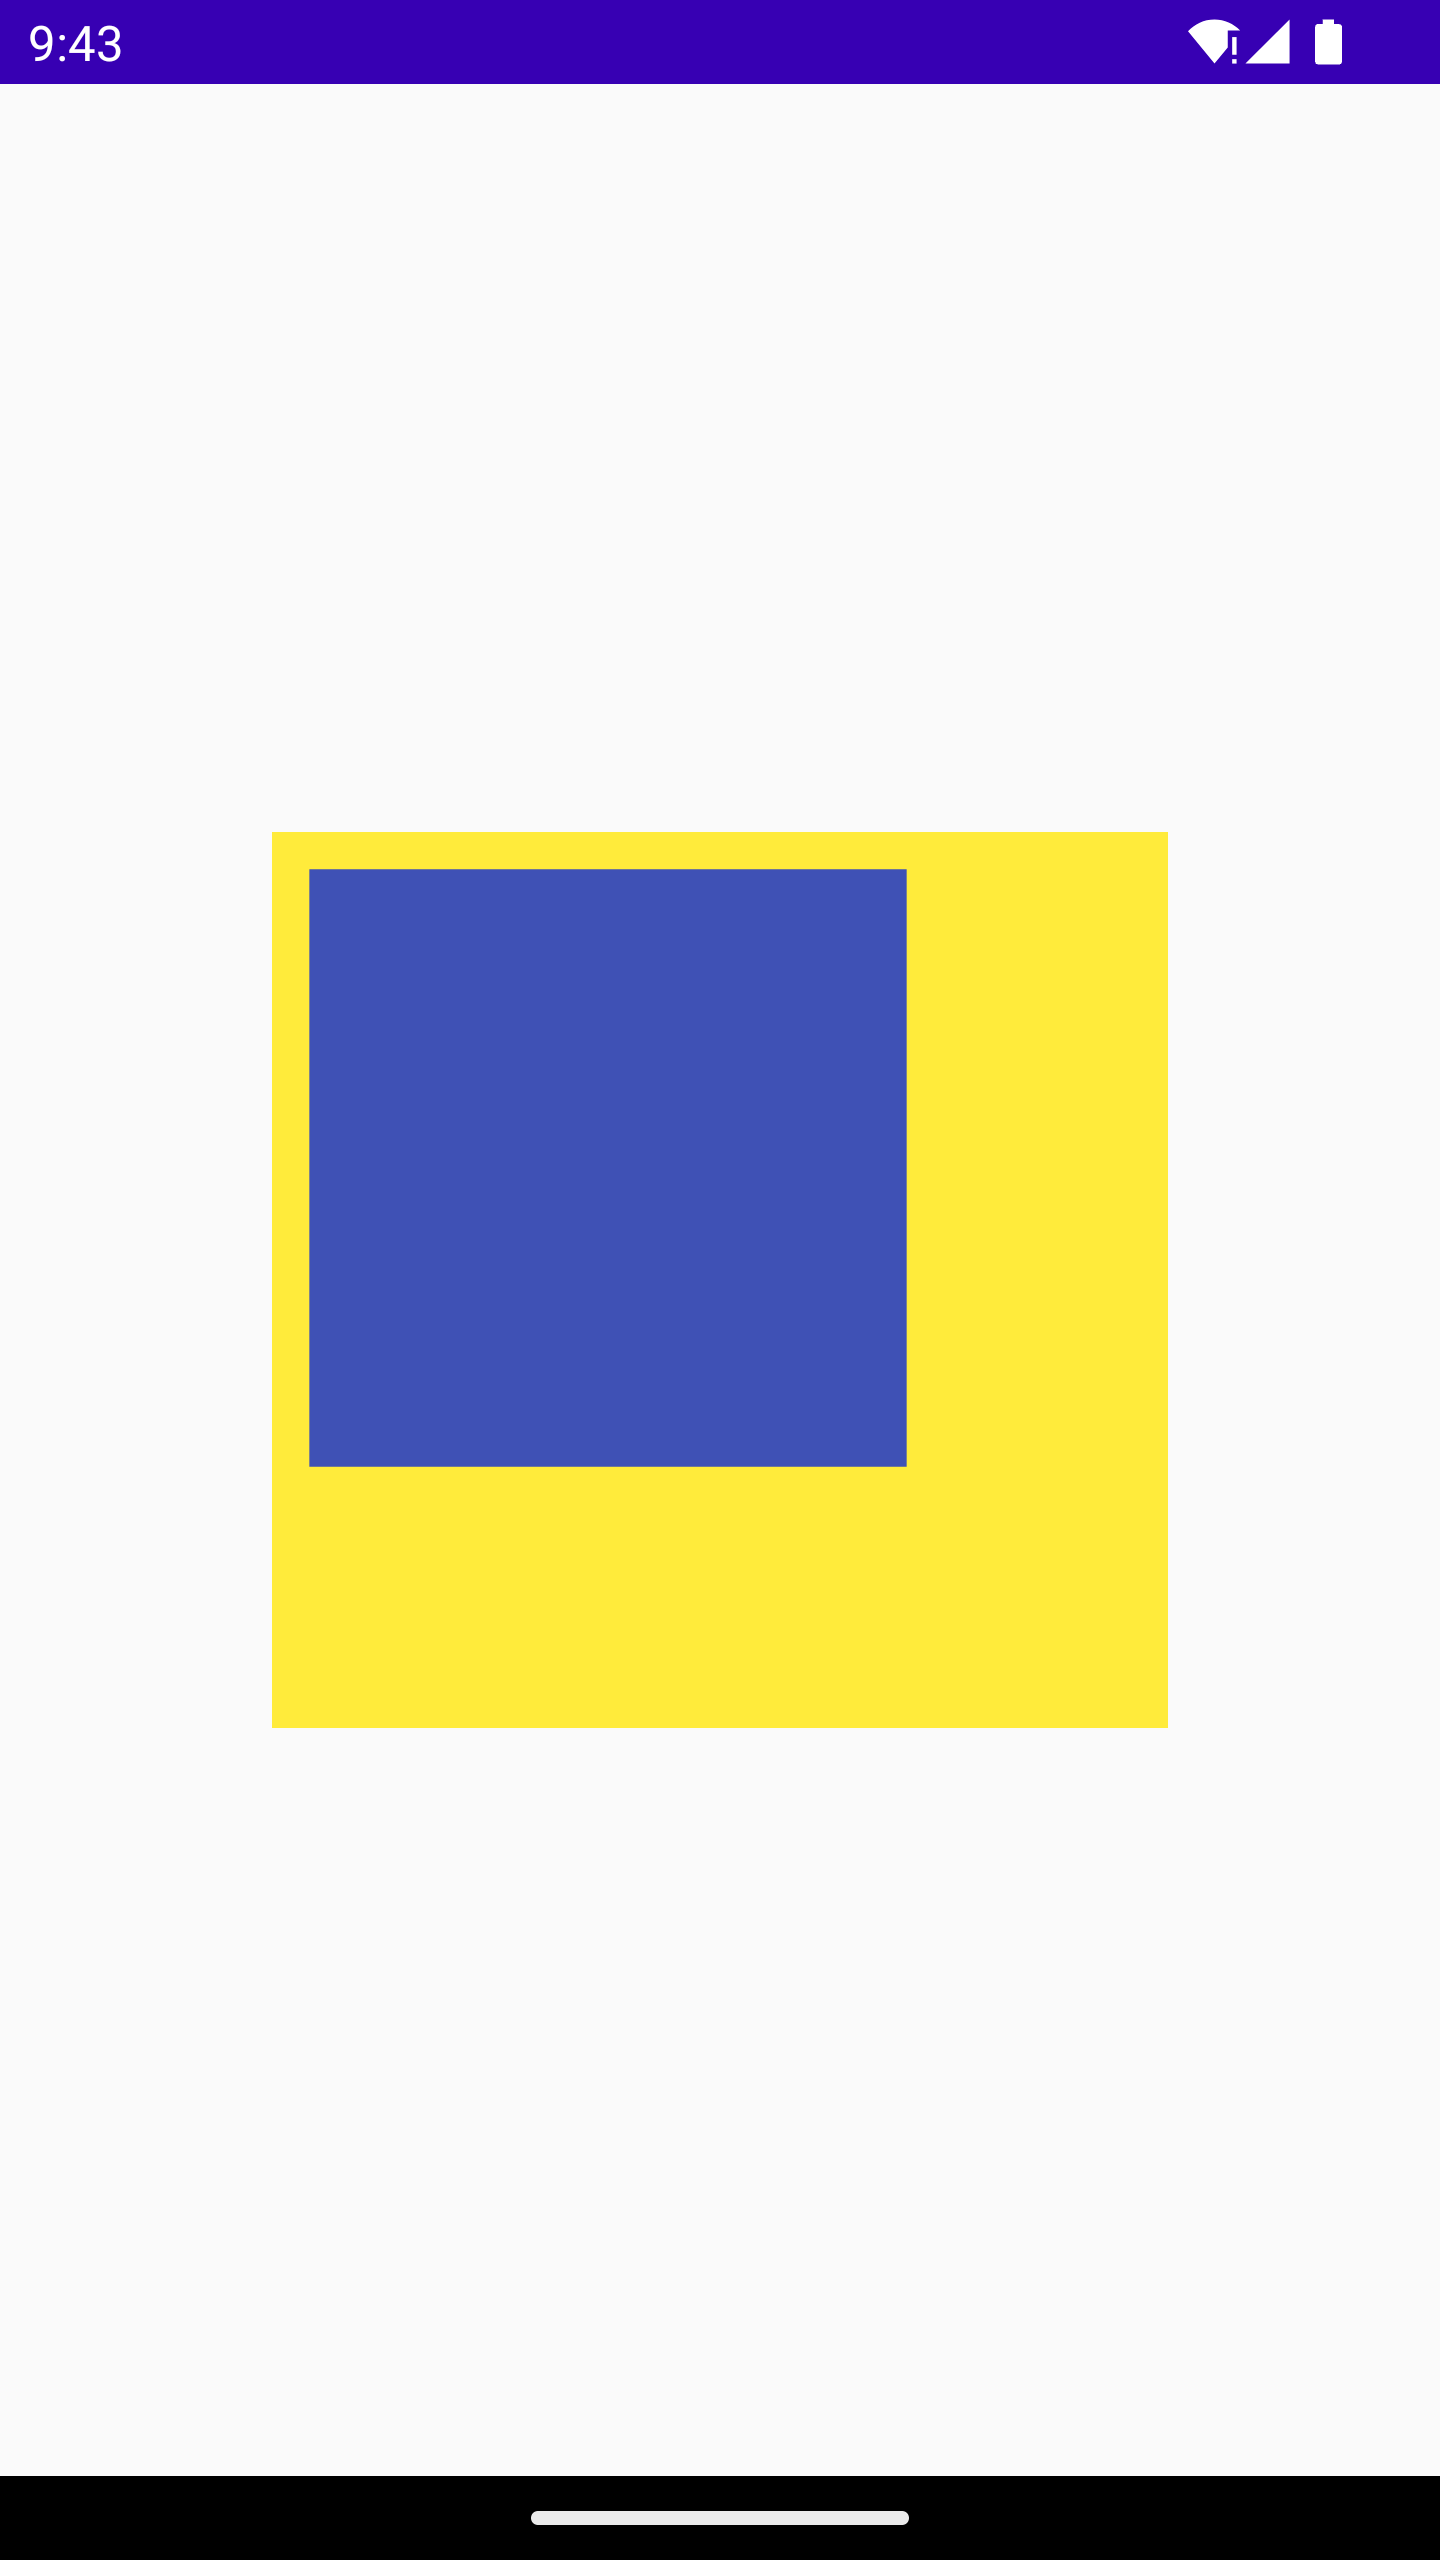
The image takes the same amount of space on the screen as before, but the blue rectangle is now smaller. This is because the width and height values stayed the same (“256dp”), but the coordinate space has changed affecting all of our commands responsible for drawing our paths.
This can be better seen in the below image with highlighted points:
Summary
To summarize, the difference between size and viewport size is that the former reports its values (width and height) to the outside world, whereas the latter defines an “internal” space that is the coordinate space of our pathData.
If you are given a vector drawable (or svg) from a designer, remember not to change viewportWidth and viewportHeight attributes. They define the size of the canvas and all pathData commands use this coordinate space. If you change them, your image might become distorted. Instead, if you want to manipulate the image’s size, just use width and height.