Introduction
As a developer, I’m always interested in different ways to improve my workflow, especially when it comes to tasks I perform frequently every single day. Switching between apps is one of those things.
I was looking for an option that would allow me to switch between apps as smoothly as possible without thinking too much about it or having to reach for my mouse.
Why weren’t existing options enough?
Using the dock
This option requires a mouse, which disqualifies it completely. Additionally, it only lets you switch between already running apps. You can’t launch an app unless you have it pinned in the dock.
CMD + Tab
This technique works fine when switching between the two most recently used apps. However, if you regularly access more than two apps, you will often find yourself examining the CMD + Tab menu looking for the app you want to switch to.
Additionally, as with the previous option, you can only switch between already running apps. Launching is not possible.
Searching with Spotlight (or alternatives)
These tools are great for launching apps but not so great for quick switching. Not only do you have to use a shortcut to trigger the search bar first (usually CMD + space), but also type at least a couple of characters to find the app you’re looking for.
Stage Manager
This feature has been introduced in macOS Ventura. Although it seems really useful at first glance, it’s still mainly a mouse/trackpad-oriented feature.
Solution: custom shortcuts
The technique that proved to be the most effective one for me was assigning a custom keyboard shortcut for every app I use frequently.
To do that, I first remapped the right command to act as the so-called hyper key (using Karabiner). This means that when I press the right command, it acts as if the CTRL+SHIFT+CMD+OPT modifiers were pressed simultaneously. This combination is pretty much guaranteed not to conflict with anything else on your computer. What kind of app would define a shortcut involving all four modifiers anyway?
Next, I defined shortcuts for some of my apps using the hyper key. I did that in the Raycast app. It was the easiest option for me because I have already been using it as a Spotlight alternative anyway. However, if you don’t use Raycast, any other tool would work just fine for that purpose, like BetterTouchTool.
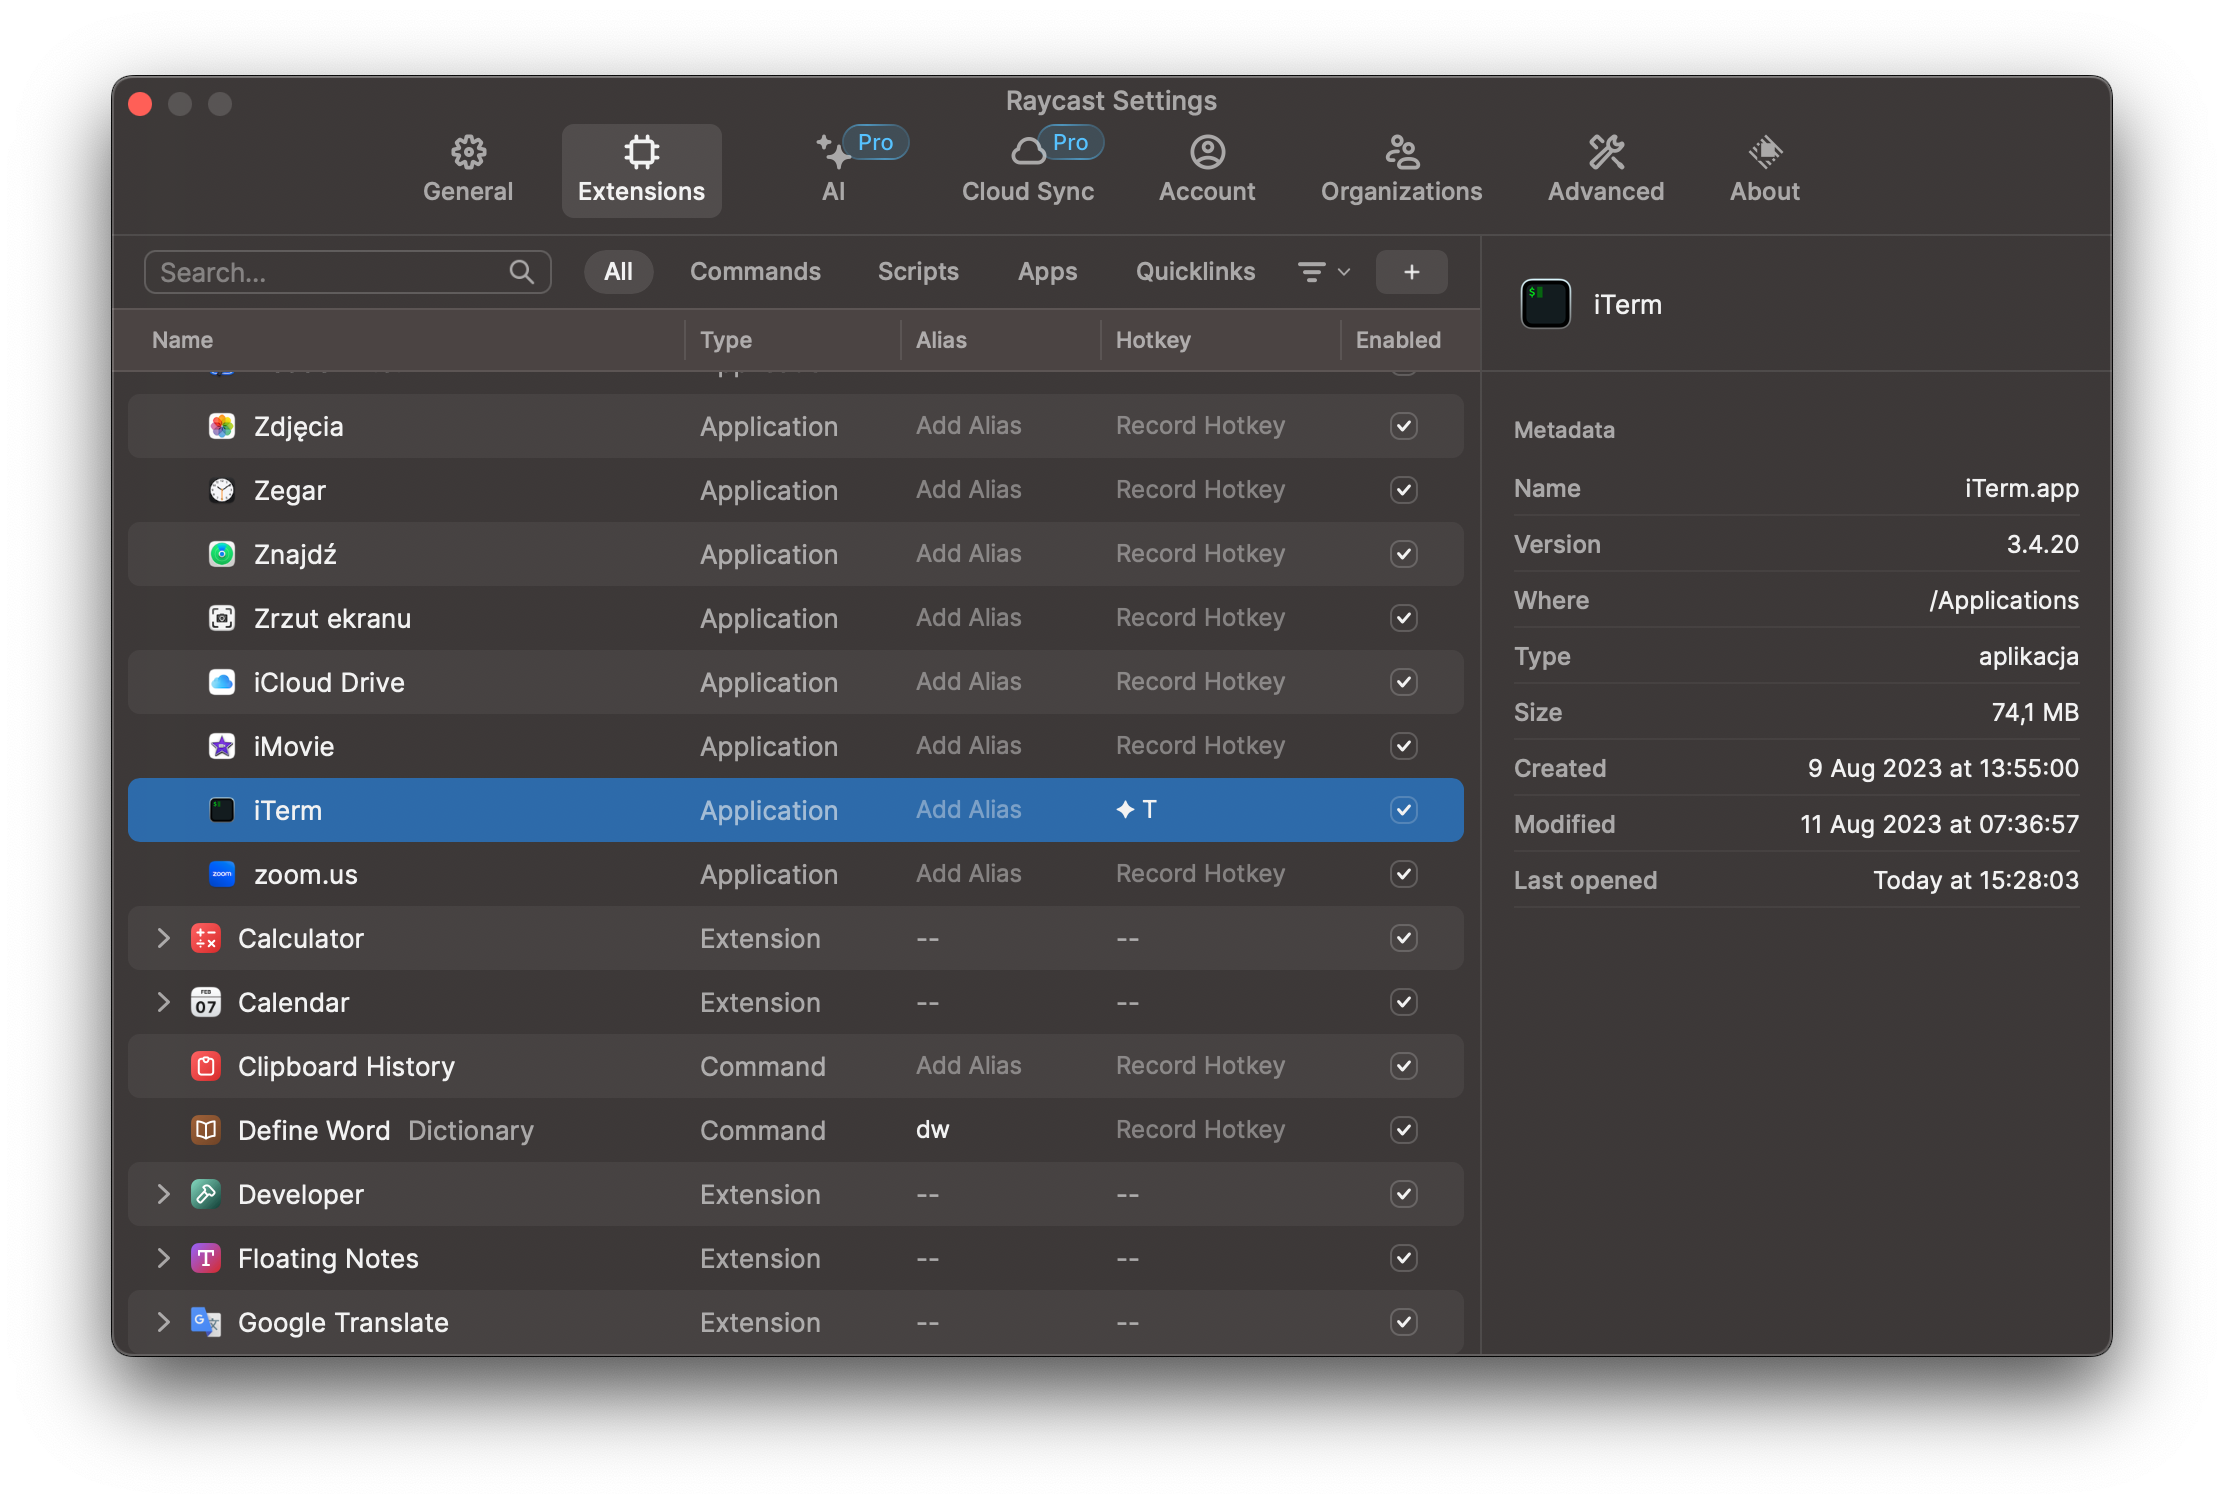
Assigning hyper key + t shortcut to access iTerm in Raycast’s settings.
After these changes, I am always a single keyboard shortcut away from apps I commonly use. This is what my workflow looks like in practice:
My workflow for quickly switching between apps using shortcuts.
This approach has another benefit of being able to launch the app if it wasn’t running already and also switch focus to another monitor or space if the app is somewhere else at the time of pressing the shortcut.
Switching between spaces
Besides assigning shortcuts for apps, I assigned shortcuts for spaces. In practice, I use them less often, but they can be valuable in some situations, like when I have multiple apps’ windows arranged in a certain way in various spaces and want to switch between them quickly.
You can do that in the system settings without installing any third-party app by going to Keyboard -> Keyboard Shortcuts -> Mission Control (make sure first to open some spaces because these options won’t be visible otherwise):
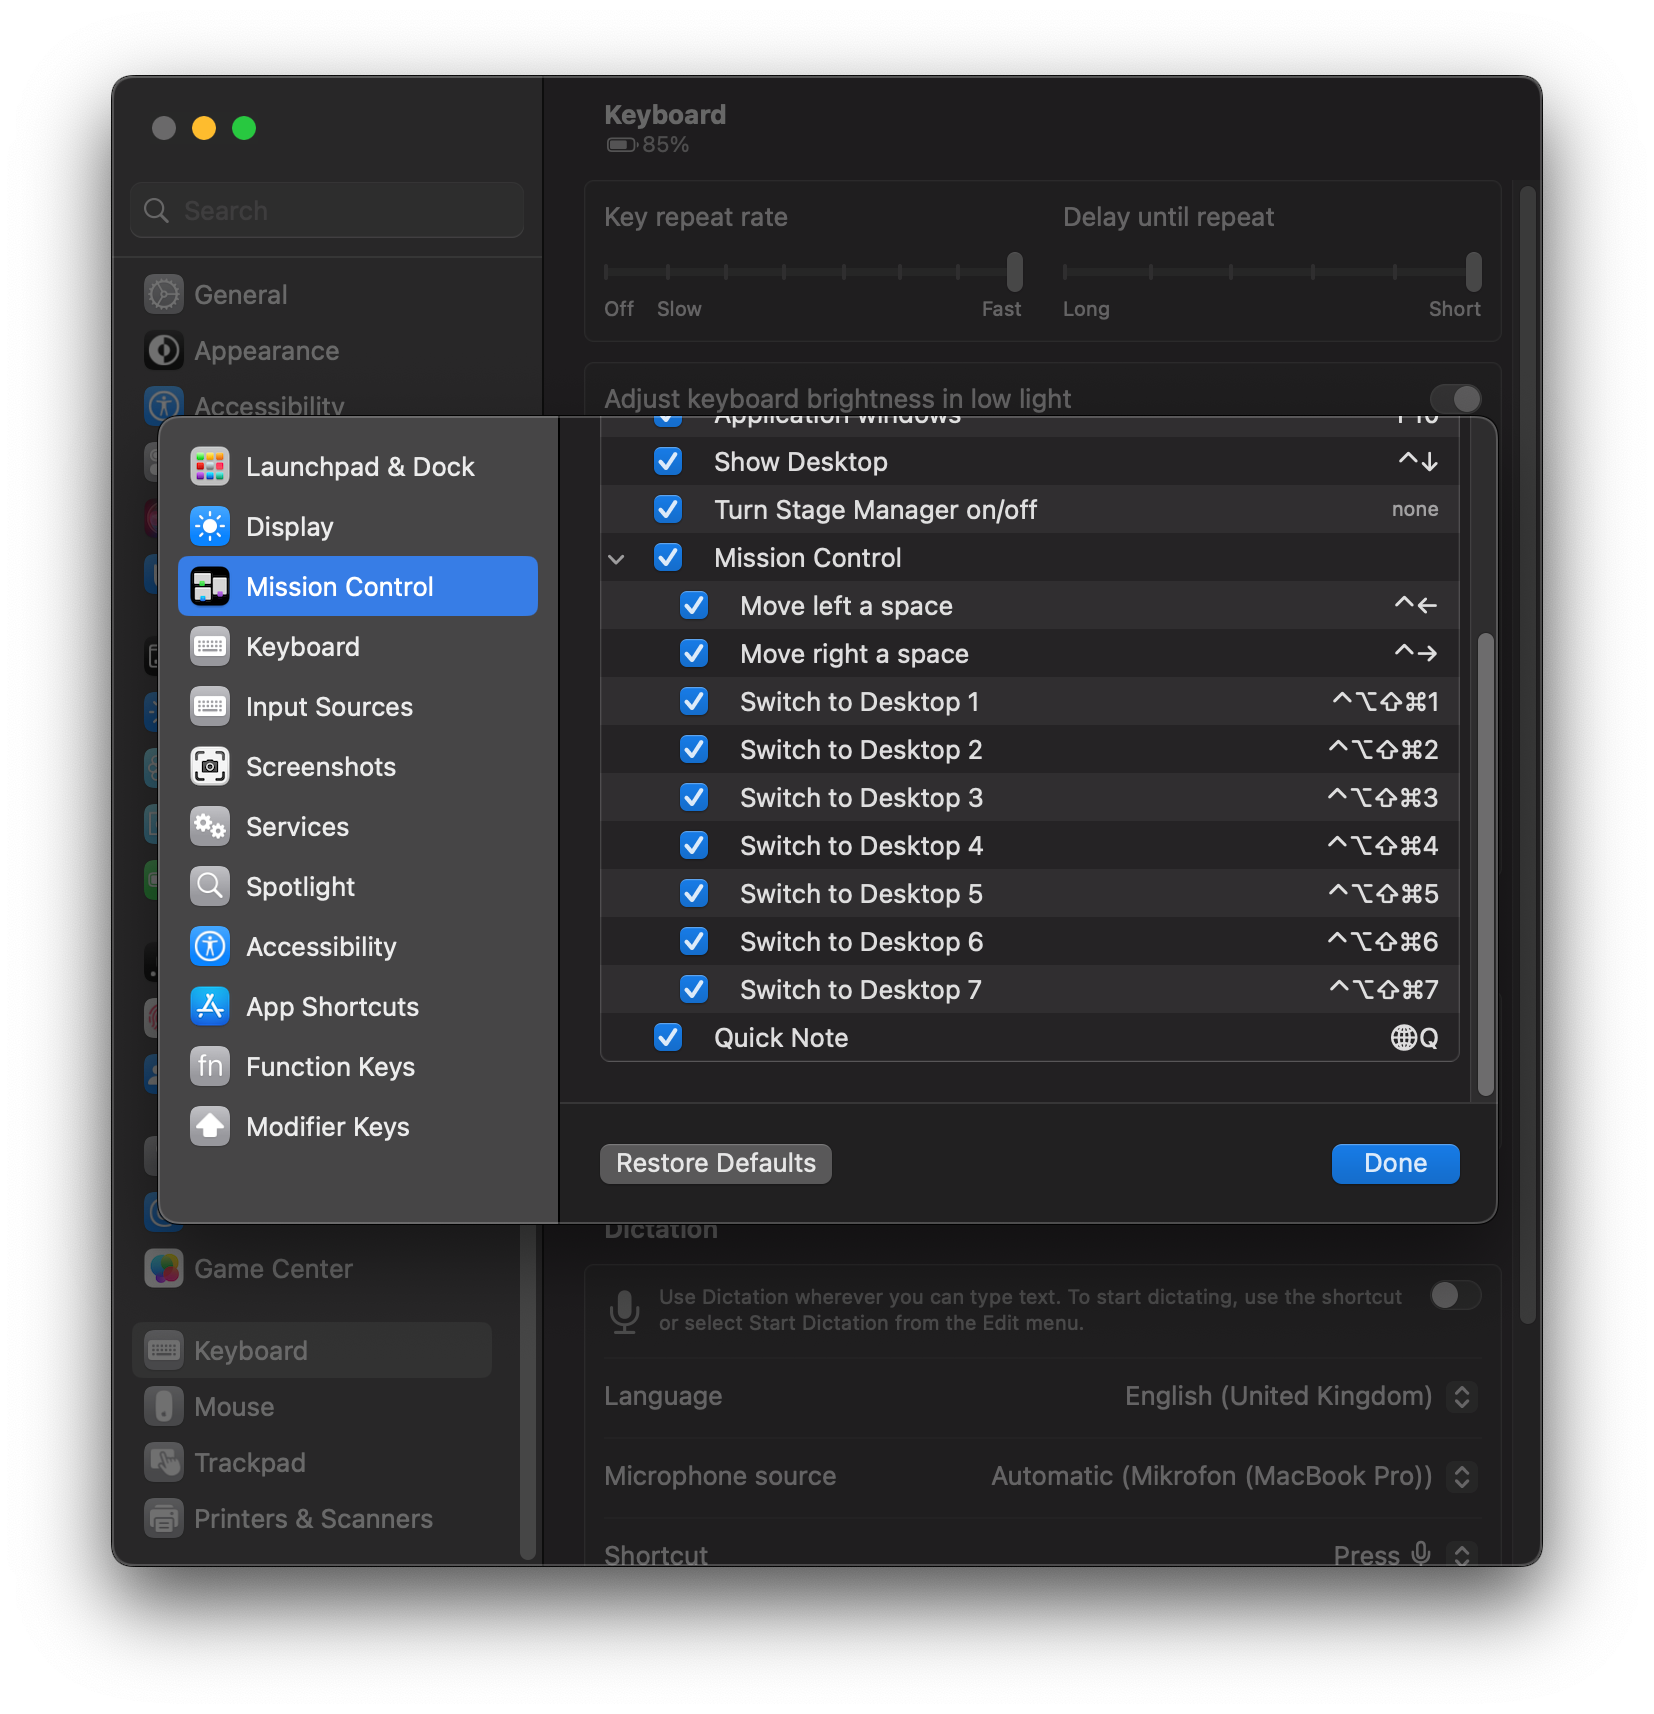
Assigning shortcuts for spaces in the system settings (I used the hyper key again here).
I was slightly annoyed by the default transition animation when switching between spaces. Luckily, it can be minimized by turning on the Reduce motion option in the system settings (under Accessibility -> Display). Keep in mind that it won’t get rid of that animation completely. There are ways to turn it off completely, but they all require disabling the System Integrity Protection, which I’m not interested in doing (especially on a work laptop).
Summary
I hope you found this post useful. If you have some ideas about how this workflow could be improved even further, let me know here in the comments section or reach out to me on Twitter.