Introduction
Imagine you spill a cup of coffee onto your laptop keyboard one day. The damage is permanent, and you desperately need a new machine.
Now, ask yourself a question. How long would it take to bring your new machine to the previous state? That includes all user settings, editors and shell configurations, installed apps, and more.
If the answer is “a couple of days”, or even worse, “a couple of weeks”, continue reading to find out what you can do about that.
This post will show you how and where I store all my configuration files (dotfiles) to make switching between many machines a breeze.
Even though it might be quite an investment of time initially to set everything up, it will undoubtedly pay off in the future.
Repository
I keep all my dotfiles and initializing scripts in a repository on GitHub. Feel free to use it as a template and adjust it to your needs and preferences. I, for example, was inspired by Freek Van der Herten’s repository.
Every time I want to set up a new machine, I clone my repository and run these simple commands:
chmod +x bootstrap
./bootstrap
Then, I follow the instructions on the screen which will do the job for me:
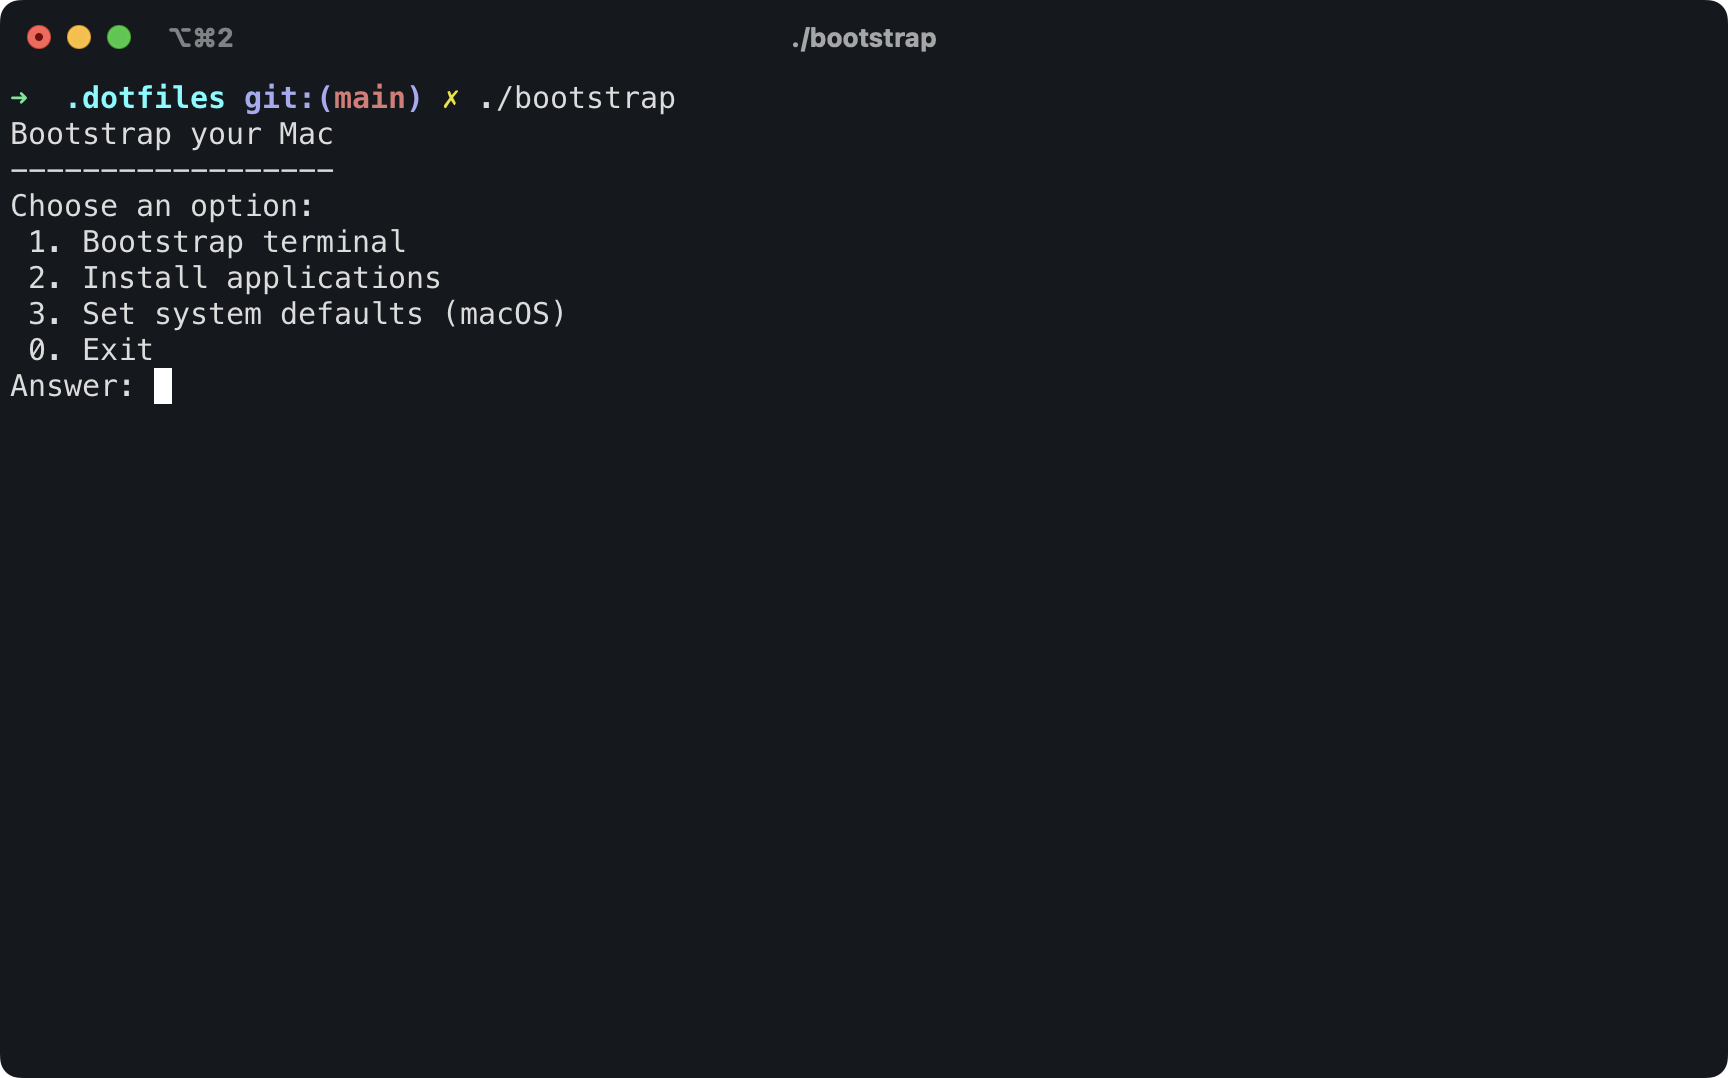
I usually go through all of these options sequentially when starting from scratch. Let’s explain what each of them does:
1. Bootstrap terminal
As the name suggests, this step is responsible for bootstrapping my terminal, which includes:
- Hiding the “last login” line when starting a new session.
- Installing oh-my-zsh. My terminal of choice is iTerm2. I’m using the Z shell with oh-my-zsh. It has a lot of valuable functions, plugins, helpers, and more. I highly recommend this combination.
- Creating symbolic links for .zsrhc and .vimrc. The latter contains a basic configuration for Vim. The former stores all the exports, aliases, and functions I frequently use when working on the shell. It also configures the theme (robbyrussell) and specifies used plugins (in my case: git, adb, macos, and laravel). Usually, plugins will give you auto-completion for specific commands and some useful aliases. Check out the Wiki for a complete list of plugins for oh-my-zsh. For example, here’s what the auto-completion looks like for the adb plugin. As you can see, I can also navigate between suggested options using arrows, which is very convenient:

Sometimes I want to export variables (or aliases and functions) that I wouldn’t store in a public repository for security reasons. In that case, I can create a .dotfiles-custom folder that git does not track, and the .zshrc will also load everything from there.
- Activating z.sh. If you’ve never used it before, do yourself a favor and try it. It’s a tremendously helpful and popular bash script for quick navigation between visited directories on your file system. For example, if you want to
cdinto a deeply nested directory (likeDevelopment/Mobile/Android/MyProject), you don’t have to specify the entire path. It’s enough to typez projectto get there immediately (provided you have visited this directory before so that the script could save it in local history). It also works for sibling directories, as you can see below:
- Installing and setting up Homebrew. This package manager probably needs no introduction for macOS users. This substep also includes installing packages I use on most computers, like git, python, java, node, mysql, etc.
2. Install applications
You might be surprised that you can install regular GUI applications for macOS (those that require downloading .dmg files and running the installer) without leaving the terminal. It’s possible thanks to an extension to Homebrew called Homebrew Cask. Installing an application is as easy as running a single command (provided it’s available as a Cask):
brew install --cask firefox
This setup’s step is straightforward. It’s responsible for installing some apps (listed in the repository) using the above method.
Some apps, like IDEs, have their own configurations, which might include custom keyboard shortcuts, formatting styles, etc. I also keep them in my repository (in most cases as zip files) to easily import these configs after installation.
3. Set system defaults (macOS)
Here, the script specifies values for some system preferences, like disabling the sound effect on boot or showing all file extensions by default in Finder. There’s no shortage of things you can do. To learn more and get some inspiration, here’s a helpful website with some demos: https://macos-defaults.com.
Summary
I hope I convinced you that it’s worth setting up your dotfiles repository to have a single place where all your configurations lie. Thanks to that, switching between many machines will be a piece of cake.
If you have some tips that you would like to share with me regarding this topic, feel free to reach me on Twitter.